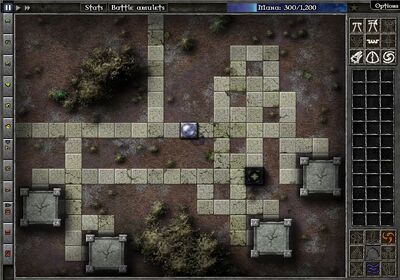
Field B11 Map
Field B11 is available after completing Field A11 in Gemcraft Labyrinth. This field is somewhat difficult. Monsters can come from all directions until you destroy the nests. It will take a while, but once you destroy the monster nests, it's as easy as the rest. There are 12 waves in this level. The gem types available are Slow and Mana Gain.
Starting Out[]
On the Field[]
- 1 Lightning Shrine
Enemy[]
- 4 Monster Nests (1,100 HP)
Waves[]
| Wave # | Monsters | Hit Points | Armor Level | Speed | Mana per kill |
| 1 | 15 | 8 | 0 | 2 | 8 |
| 2 | 12 | 9 | 0 | 1.5 | 11 |
| 3 | 13 | 11 | 0 | 2 | 10 |
| 4 | 13 | 13 | 0 | 2.1 | 11 |
| 5 | 13 | 16 | 0 | 2.3 | 12 |
| 6 | 15 | 18 | 0 | 2.3 | 11 |
| 7 | 12 Armored | 30 | 7 | 1 | 14 |
| 8 | 12 | 25 | 1 | 1.5 | 15 |
| 9 | 11 | 30 | 1 | 1.9 | 17 |
| 10 | 16 Runner | 28 | 1 | 4 | 12 |
| 11 | 16 | 42 | 1 | 1.6 | 12 |
| 12 | 8 | 49 | 1 | 1.9 | 26 |
Conclusion[]
After you defeat Field B11, your path continues toward Field B10, if you don't already have it.
Wild Gem[]
The wild gem type in this level is green-cyan-lime.